

How To Use Camera Features On Mirrorless
How to Take Slap-up Photos with a DSLR or Mirrorless Camera
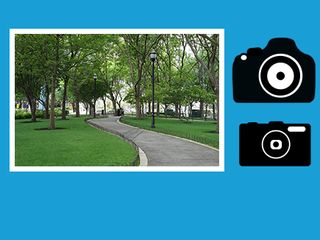
Your first DSLR or mirrorless photographic camera tin can excite you with its promise of professional-looking photos. But the knobs, dials and buttons on the camera may exist intimidating for showtime-timers, and fifty-fifty pros might non know what some of the controls practise. Fright not: Utilize this guide as a cheat sheet to get the well-nigh out of your photographic camera in mutual shooting situations.
For help with any of the terms nosotros use in this article, please see our Digital Photographic camera Glossary.
What modes should I use?
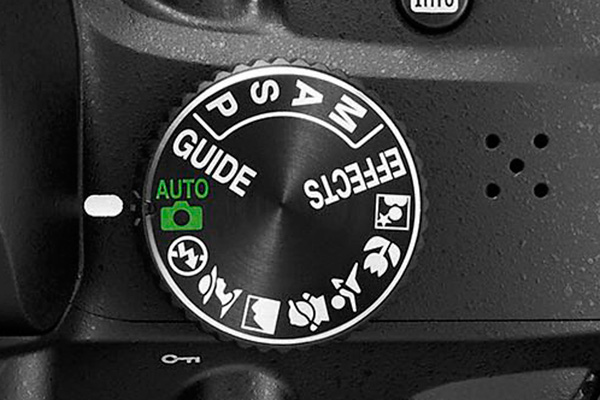
Yous'll find a style punch on tiptop of near cameras. Virtually all DSLR and mirrorless cameras offer a total transmission fashion that lets you control shutter speed and aperture. Information technology's the photographic equivalent of driving a stick-shift automobile: If you mess upwardly, the camera won't aid you. If yous're not confident near handling all of these settings or are shooting in situations with quickly changing lighting weather condition, you're improve off choosing shutter or Aperture Priority mode, which we'll explain in a bit.
Novice shooters tin can effort Plan mode, in which the camera decides what residuum of shutter speed and discontinuity is best to go a good exposure. Withal, Program style allows you to adapt a few other settings, such as ISO calorie-free sensitivity.
Many DSLRs and mirrorless cameras offer additional specialty modes. On Canon cameras, for example, you can choose Creative Auto (CA) mode, which gives you lot some control over the level of background mistiness (depth of field) and colour richness.
A quick note on lenses and camera formats
The size of a camera's prototype sensor affects the focal length (zoom level) of a lens. Near DSLR and mirrorless cameras apply what's called an APS-C image sensor. All the same, Olympus and Panasonic cameras utilize a sensor size called micro four/3, and professional cameras use a total-frame sensor. Throughout this guide, we will recommend lenses for APS-C cameras and offering the equivalents for the other ii in parentheses.
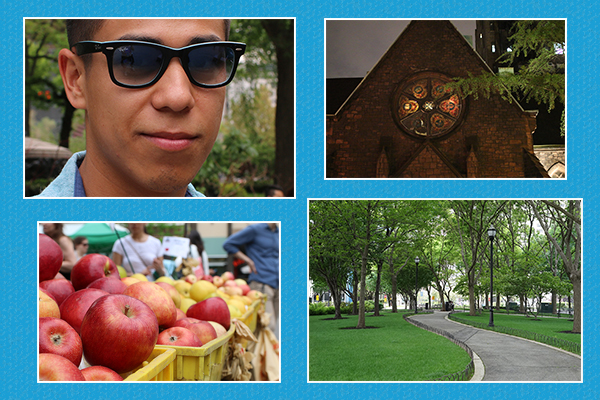
How to capture action photos

The correct shutter speed is crucial to how you lot want an action shot to look, whether you freeze the movement completely or provide varying degrees of mistiness. To freeze action, follow these steps.
1) Put the camera in Shutter Priority way. On some Canon cameras, this is labeled Tv set (time variable), while on Sony and Nikon models, it'due south labeled S.
ii) Set the shutter speed to 1/250 second to capture most movement, such as people walking effectually.
3) If your subject is extra fast, you lot'll want to use much faster shutter speeds. For example, i/1250 2nd did the flim-flam for freezing a baseball in mid-flight besides as people jumping in the air.
How do I take portrait shots?
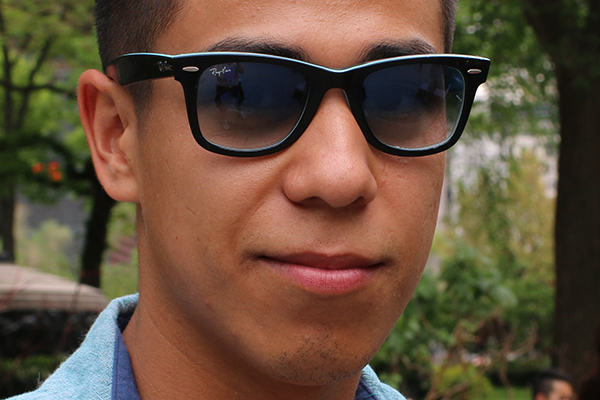
In general, y'all will become the all-time results with a shallow depth of field (controlled by the aperture). This keeps your subject sharp but blurs out the background so it doesn't distract. Follow these steps:
1) If you're using a zoom lens on a mainstream photographic camera, gear up it to about 35mm, or utilise a 30mm or 35mm prime (nonzooming) lens to get a good nondistorted bending of view on the subject (about 50mm on a full-frame camera or 25mm on a 4/3 camera).
two) Gear up the camera on Aperture Priority ("A" on Sony or Nikon, or "Av" on Catechism) using the mode punch.
3) Use an aperture of f/8 if in that location is enough distance between the subject field and the background — say about xx anxiety. If the altitude is less, try a larger aperture, such as f/five.6 or larger, to maintain a shallow depth of field.
How do I take landscape photos?

Keep your camera on Aperture Priority, simply upward your aperture to f9 or college to keep things in the distance in focus. If you lot desire to keep everything in the picture sharp (from foreground to groundwork), set your aperture at 22 or higher. Using a wide-bending lens, such equally those with focal lengths between 11 and 22mm (about 17 to 28mm on a total-frame photographic camera or 7 to 14mm on a micro four/three).
How practise I accept photos in low light?
When at that place isn't enough light in your environment for a good shot, y'all may want to apply a larger aperture or slower shutter speed to let more than low-cal into the photographic camera.
Slower shutter speeds could magnify blur acquired by movements, such as shaky hands, on the part of the photographer.
If y'all don't take a tripod or yous need to shoot action, turn your photographic camera to Shutter Priority and prepare your shutter speed to 1/lx of a 2nd. If you have an epitome-stabilized lens, make sure that function is on, and you lot can fix the shutter speed even slower if needed — for example, to i/30 of a second.
Whenever possible, use a tripod, or something stable, such as a table or window ledge, on which to balance your camera. If yous've done that and take an image-stabilized (IS) lens, turn off image stabilization. While IS helps during handheld shots, it actually introduces a flake of shake if the camera is sitting perfectly still.
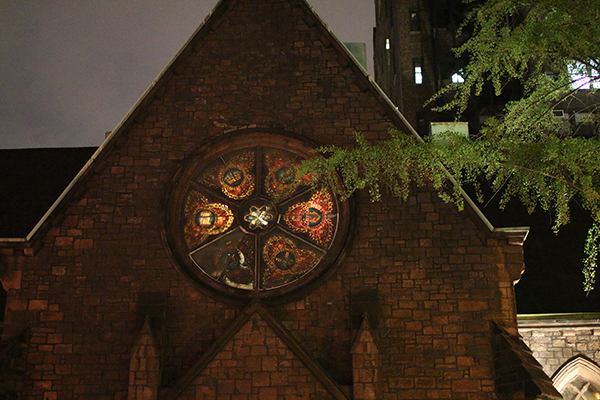
This scenario with a deadening shutter speed works well for shooting scenes with footling or no movement, such as a building at night. You'll besides want to apply Timer mode or a remote control (connected via cablevision or wireless smartphone app) to trigger the shot, eliminating the milk shake that happens when your finger presses the Shutter button.
Advanced shooters with a DSLR using a remote control tin can set "Mirror lockup" in cameras with that function. This locks the mirror in the raised position then that it doesn't have to flip up and cause vibration. Pressing a button on the remote simply opens the shutter to expose the sensor.
How do I utilize high dynamic range (HDR)?
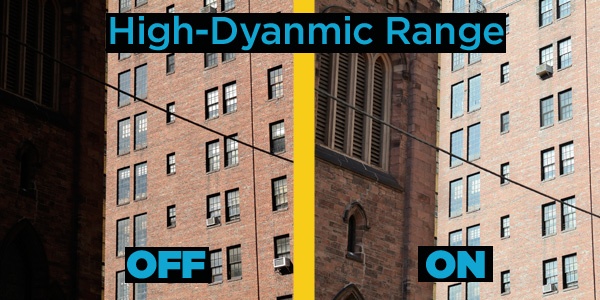
HDR instructs the photographic camera to capture the aforementioned scene at several different exposure levels (usually iii) and combine the images so that all components — from brightest to darkest — are properly exposed.
This is most useful for pictures with varying lite settings in one scene, such as a mural photograph of a woods with dark trees in the foreground only bright sunshine in the background.
On some cameras, y'all tin can determine what exposure bounty stops to shoot at, and you accommodate that by going into the photographic camera's settings.
What ISO low-cal-sensitivity settings should I use?
Get more detail in dark rooms or at night by adjusting your ISO lite sensitivity. Setting your ISO to Machine volition serve y'all well on near cameras, and frees you up to concentrate on other relevant settings (such as shutter speed or discontinuity).
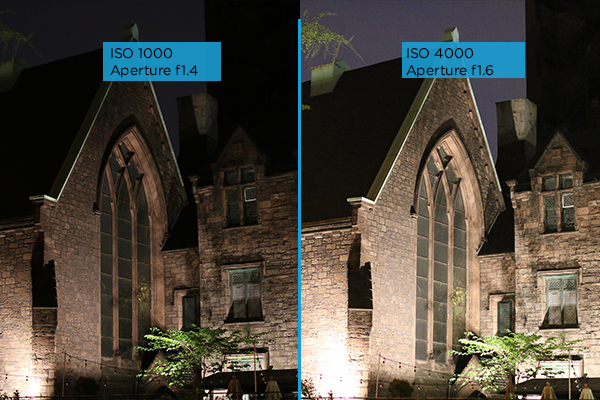
To reduce grain in your pictures, though, set your camera to cap ISO at the highest level that yet produces acceptable photos. ISO 3200 is a pretty condom bet, but some cameras can go college before images become also grainy.
Equally a rule of pollex, use the lowest ISO possible that still achieves proper exposure as well as depth of field (aperture setting) and shutter speed (move freeze or blur) that you're shooting for. If you accept to go higher though, it'south amend to do that and get the shot rather than miss it.
Whether you decide to adjust ISO manually or leave it upward to the camera, make sure to plough on Noise Reduction to keep out fuzziness in your pictures. Some cameras offering varying degrees of noise reduction. Experiment to observe the one that removes plenty graininess without removing also much detail from the images.
More:How Many Megapixels Do You Actually Need?
How do I become a well-exposed photo?
A photographic camera's light meter determines how much low-cal is needed for a properly exposed photograph and tells you via the display if your current setting is correct.
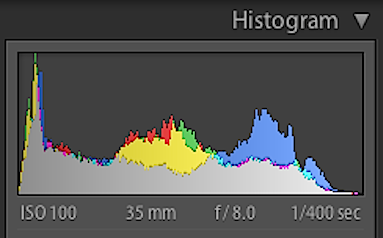
An oftentimes-neglected tool on cameras is a histogram, a graphic showing the distribution of low-cal and dark elements in the frame. Ideally, a histogram will look like a bell curve, with nearly of the prototype in the midtone levels of brightness.
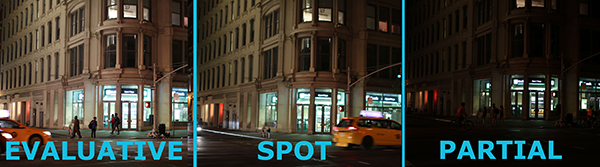
About cameras offer three metering modes: Spot, Center Weighted and Evaluative (aka Matrix or Blueprint). Evaluative will typically be your best bet, since it looks at the whole epitome and determines the best exposure for the overall picture.
If you're still getting overexposed or underexposed images, y'all can try changing over to Eye Weighted or Spot Metering modes, or adjusting the exposure compensation (see beneath).
Spot Metering makes the camera measure merely a small spot in the middle and ignores the rest of the frame, while Center Weighted considers the whole moving picture but emphasizes the center. This setting is useful for situations in which a specific area in the image is lit up but the surrounding region is dark, such as a singer on stage or a person bravado out altogether candles.
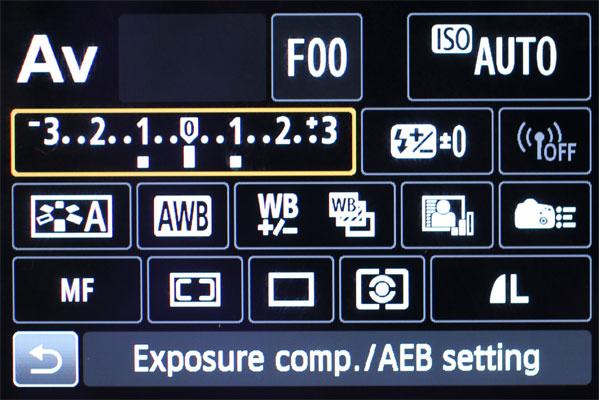
How practice I brand photos lighter or darker using exposure compensation?
In ane of the priority or auto modes, most cameras shoot for what their makers have ready as an ideal level of exposure. However, yous tweak shutter speed, discontinuity or ISO; the camera will compensate with the other settings to match the same level of exposure.
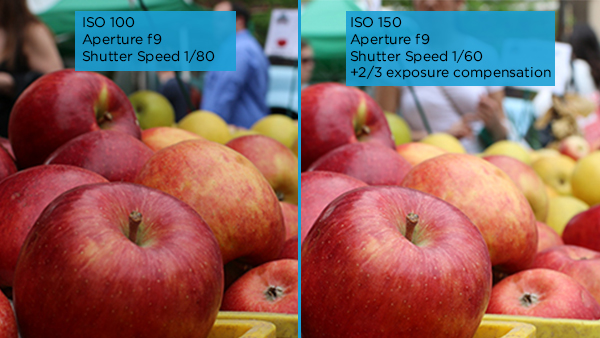
You lot tin gear up overall brightness by turning upward or downward a setting called exposure compensation. The tool to do this is typically marked past an "EV" sign on a scale, with "1, ii, 3" and "-1, -ii, -3" on either side of a "0." Each mark between these digits is a third of a stop, and you beginning at "0" for every picture and move toward the positive numbers for brighter images and negative for darker images.
Normally, yous'll only demand to arrange exposure bounty by between one-third of a stop and a total stop. Always refer to your camera's born histogram to get a good idea of how your image is exposed.
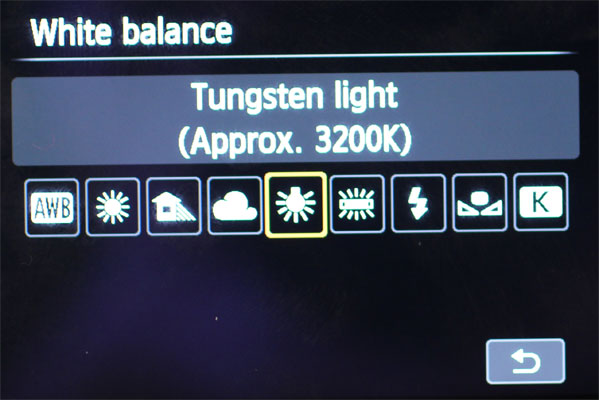
How do I accommodate white rest?
If your pictures' color looks somewhat off — for instance, if it's yellowish or bluish — you might need to conform the camera's white balance to annul ambient lighting with a heavy color cast. Virtually cameras have acceptable automated white balance for general shooting situations but crave tweaking in low-light situations, such as under incandescent lights.
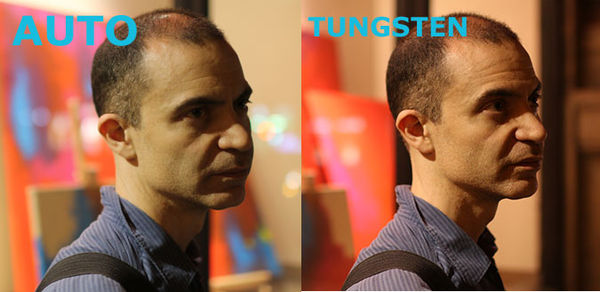
A quick prepare for this is to switch to one of the preset white-residual settings. Yous'll typically find Daylight, Tungsten or Shade every bit some of the available options, and using Tungsten nether incandescent light usually fixes pictures that are too yellow.
If the color still looks off, you may need to set the white rest manually. You'll need to provide the photographic camera with a white-colored object for reference, like a blank sheet of white newspaper.
Depending on your camera model, this could be as easy as toggling White Remainder manner to Custom and shooting a reference picture of the newspaper to show the photographic camera what "white" should await like. Even so, on some cameras, such as the Canon EOS 70D, manual White Balance is a complicated process that requires going into your device's settings, choosing Custom White Rest and shooting a reference object.
- Best DSLRs 2014
- Why Autofocus is the New Megapixel
- Camera Buying Guide 2014
Follow Cherlynn Low @cherlynnlow and on Google+ . Follow Tom's Guide at @tomsguide , on Facebook and on Google+ .
Source: https://www.tomsguide.com/us/how-to-take-great-pictures,news-19185.html
Posted by: halpinhounch39.blogspot.com
0 Response to "How To Use Camera Features On Mirrorless"
Post a Comment