

D&d 5e Character Art
How to create a classic Dungeons & Dragons style character

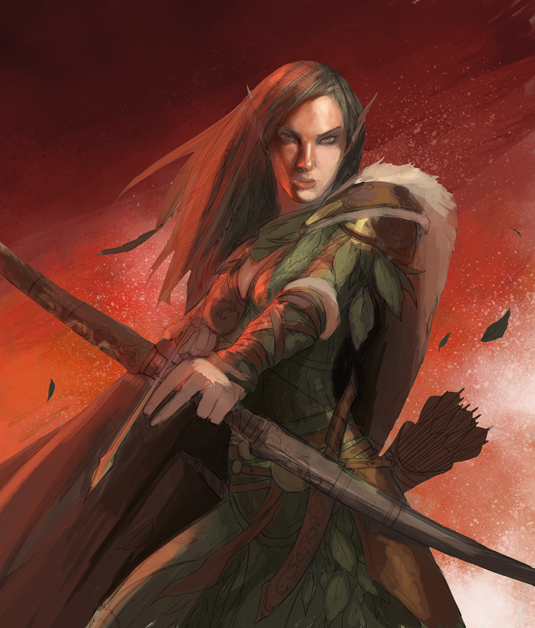
The art brief was for a female Elf Ranger in a snowy setting with some sort of red and green colour scheme for the cover of ImagineFX magazine. My main goals were to make her beautiful, powerful, confident and hopefully have some connection with the viewer. I also know that a red-green colour scheme could easily look garish or cartoony if handled too harshly. With these aims in mind, I set out to create the best image I could muster.
01. Gang of four
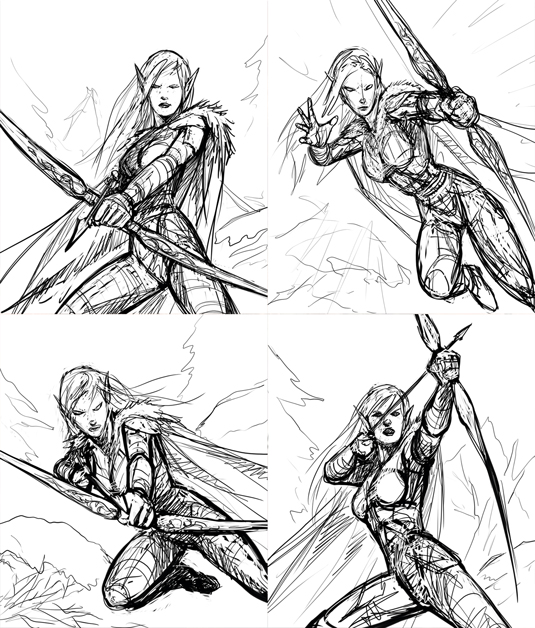
I submit four rough thumbnail sketches. These are just quick, loose sketches, conveying general pose and composition. I'm not too worried about what she's going to be wearing at this point. I also keep the background pretty sparse, because I want the image to focus on the character.
02. Down to two
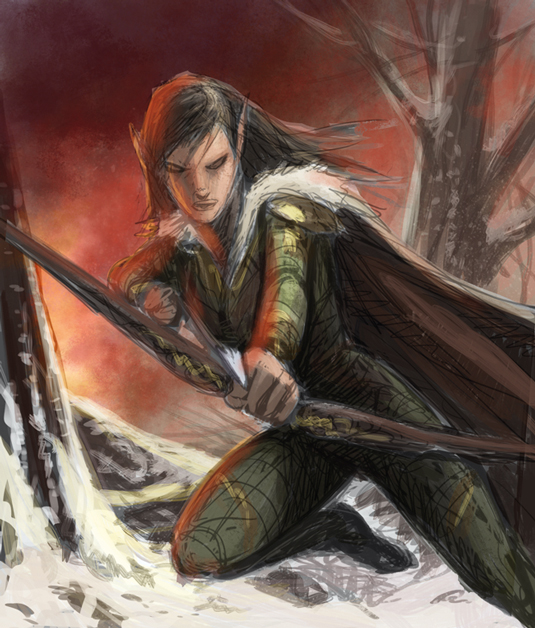
I usually do a tight sketch and add greyscale values before I start working in colour, but the art editor wants to see two of the rough sketches in colour before deciding on which of the images to go with.
This image, featuring the Elf Ranger in an action pose, is eventually rejected on the grounds that her body angle would look awkward on the cover. In addition, the snowy background might obscure the text that will eventually be superimposed onto the scene.
03. Face the facts
I start defining the face. I spend a lot of time trying to get the lighting and expression just right. Other parts of an image can be less defined if need be, but the face is what's going to grab the viewer's attention.
04. Light it right
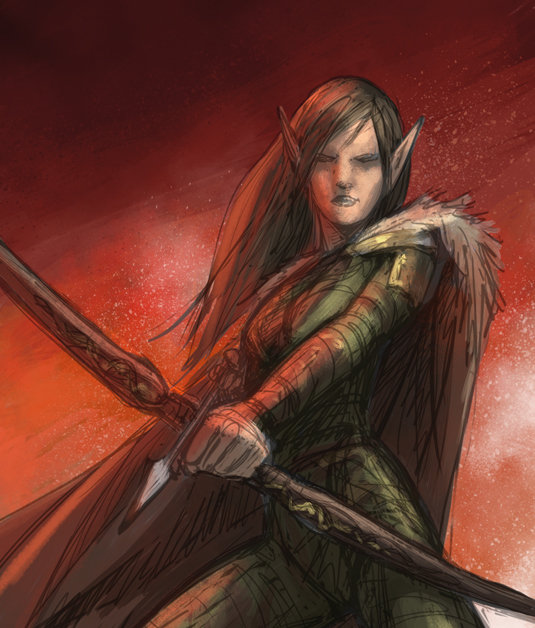
The face is the most important part of the image. It's what sells the character and compels someone browsing the newsstand to pick up the magazine. It's important to make sure the lighting looks realistic and believable, so I do a lot of research for images with similar lighting.
05. Surface tension
I now apply colour to my tight sketch. All the linework can still be seen and the basic colour scheme is all intact. I can't mess it up too badly at this point, so it's now time to render out all of the different surfaces and details.
06. Feeling of texture
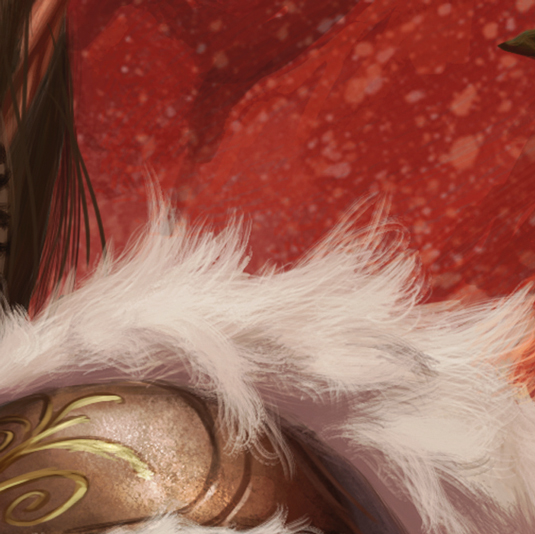
I don't use texture overlays much, but I do use a lot of texture brushes. In this close-up you can see I've used different brushes for the fur, the leather, and so on.
07. Get a grip

Once I have the official go-ahead, I dive into all the fun details that I'll be cursing myself for adding when I get to the rendering stage. I originally wanted to have her with an open grip, just to try something different, but eventually this got changed to the traditional closed grip so it wouldn't be confusing.
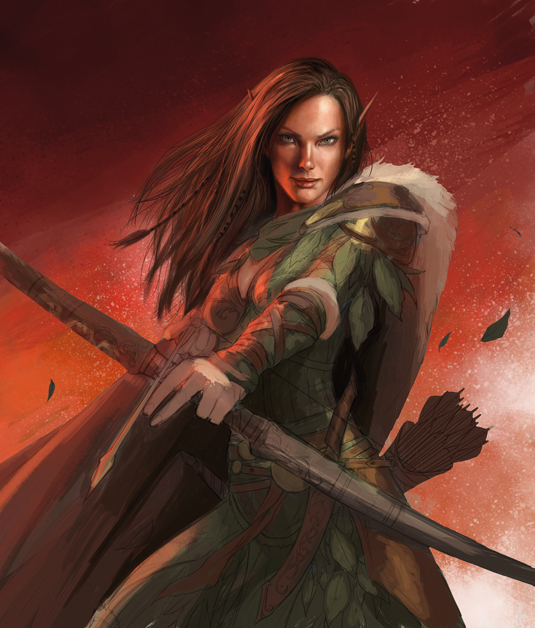
08. Scaling it up
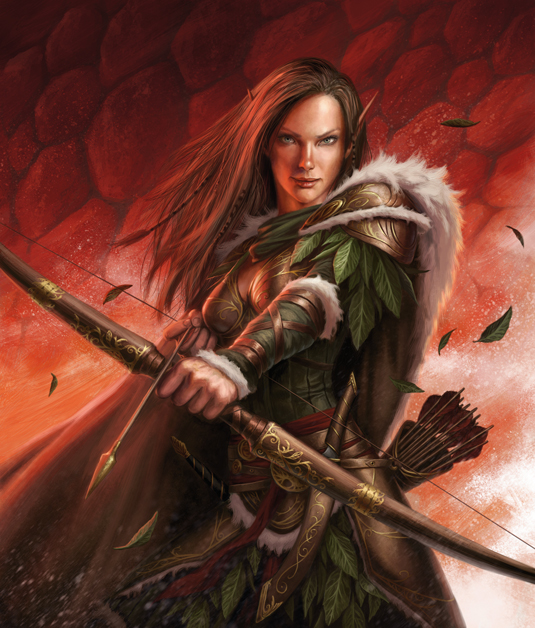
All of the rendering is now done. At this point, I step back from the piece as a whole and see what areas need tweaks in values, colour, detail, and so on. I try a version with dragon scales in the background, as if she's standing in front of an enormous red dragon that she's just conquered. The art editor likes this version and decides to go with it.
Words: Dan Scott
Dan is a freelance illustrator who produces art for book covers and interiors, trading card games, video games and comics. This article originally appeared in ImagineFX magazine issue 64.
Like this? Read these!
- How to create great fantasy art every time
- Free Photoshop brushes every creative must have
- How to promote your art online
Related articles
D&d 5e Character Art
Source: https://www.creativebloq.com/digital-art/how-create-classic-dungeons-dragons-style-character-71515743
Posted by: halpinhounch39.blogspot.com
0 Response to "D&d 5e Character Art"
Post a Comment